For my friends and family who read this, you might want to just skip this post entirely, unless you've all been harboring a secret, burning desire to make these sprite things as well, and just have never worked up the courage to ask me how to do it.
Sprite Stitching 101So I've been being a bit of a showpony around the internet, spreading pictures of my needlepoint sprites around various forums in a way usually reserved for stolen pornographic footage and email chain letters. And if my attempts to show off aren't ignored entirely, then I'm usually met with other sprite fans asking how I make them.
Now, even though I am trying to sell them (ahem: My Etsy Shop), I have no issue with instructing other people how to make them. I've been the beneficiary of free information too many times to be into the KFC secret recipe way of doing things.
So in response to the vast multitudes (read: handful (read: small handful (read: just a couple of people))) asking for this, here is my tutorial, Getting a Pattern:First I should confess: whenever one of my sprites is met with admiration, I am always a little surprised. I am very lazy, very clumsy, and very sloppy and I learned how to make these things mostly by skimming a needlepoint book during my lunchbreak at work. I tend to take a "just wing it" approach to these things, and many of my methods and preferences developed from laziness. So if you're a cross stitcher who spends time separating strands, preparing fabric, paying attention to your needle size, making sure the back looks neat, and so on, then you're already much better than I am and making these should be a simple matter of transitioning past the X-stitch.
Preparing the Pattern and Getting Supplies*** Now because I tend to act first and work out the problems later, I cannot really help you much on how to prepare your work regarding how much floss you will need or where you should position your sprite on the canvas, etc. I will tell you that I will be using 14 ct plastic canvas, which means you will get 7 pixels per inch using the mosaic stitch and 14 pixels per inch using a cross or half cross stitch. If you already have a preferred method of preparation, I would recommend sticking with it. ****
1. Before going to the craft store, find whichever sprite you want to stitch and save it to your computer. I personally prefer using
The Shyguy Kingdom since they have such a large selection. I would recommend using a simple sprite to start off - think a small NES character.
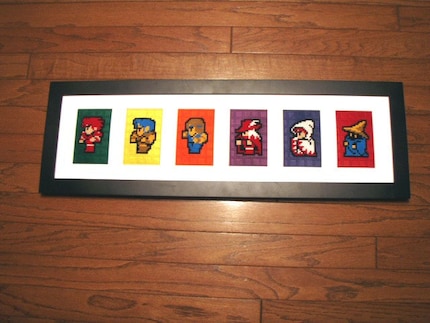
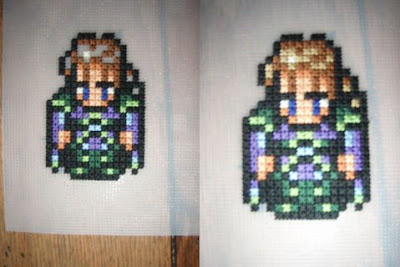
For the purpose of this tutorial, I am going to make Edgar from Final Fantasy VI because he is small enough to use the mosaic stitch, but complicated enough that he has some shading and thus some more in-depth color matching will be needed.
2. So first I right click and save the sprite sheet for Edgar to my harddrive:
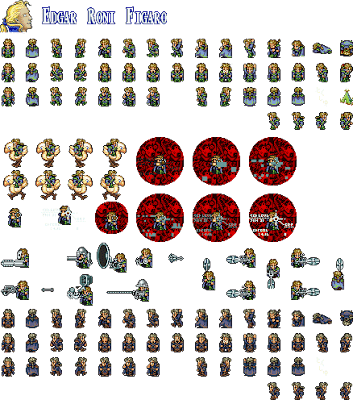
I want to do just regular old Edgar, so I will cut and paste the top left sprite into a new file on Photoshop (I am assuming you already know how to do this, but if I am assuming too much, just let me know) and save it as a bmp file. I am also going to note the size of the new file (16 pixels wide by 24 pixels long) for later.
Optional Step: If going back and forth between your home and your craft store is a big deal, figure out which color you want for the background now by using the fill bucket in the background to see which color looks good against your sprite. I usually wait until after I have finished stitching my sprite to figure out what my background color will be, but I also work next door to Hobby Lobby so frequent visits is not a big deal. When you have found a color you like, save it and PCStitch will also give you the floss number for that color.
Now I have regular old Edgar, all by his lonesome:

Ignore the fact that he looks green on this website. I don't know why that happened. The actual file on my computer does not look green, and that is the important thing.
*** Note: This next step will be a doozy, and it is ONLY TO FIND OUT WHICH COLORS YOU NEED VIA PCSTITCH. If you are doing something simple, like the original Megaman, you can run the sprite through PCStitch to get his exact colors or you can just go to the craft store and get black (310), white (5200), a fleshy color (I use 945 most of the time, but PCStitch recommends 744 in the case of Megaman), and whichever light blue and dark blue you happen to think matches up the best (by the way, PCStitch recommends 3846 for light and 3843 for dark in the case of megaman). If you are doing a complicated sprite with a lot of shading or colors, I strongly recommend using PCStitch or whatever your already preferred method is if you're an experienced stitcher. It would suck to finish one of these things, then stand back and realize it looks kind of weird because you got the wrong shade of blue ***
3. Since Edgar is has some complicated coloring going on, I am going to run him through
PC Stitch first. PCStitch is a great program you can download as a demo for free (you can't save or print in the demo but we won't be needing to do that here anyway).
After opening PCStitch, go to File > Import and import the bmp file you saved earlier. The first screen will allow you to crop the picture. I don't need to crop any of Edgar, so I'm just going to hit next. The next screen allows you to erase parts of the picture. Again, I don't need to erase any of Edgar, so I'm going to hit next. Now here is the important screen:
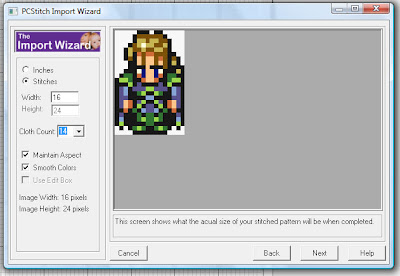
I am going to click the "stitches" option and enter in 16 pixels wide by 24 pixels long (from before when I noted the dimensions of the image in photoshop). For this particular image of Edgar, it should not matter, but I generally unclick "smooth colors" as well. It also does not matter for this tutorial (we are just using the program to get the DMC colors), but, depending on your project, you might also want to make sure the cloth count input matches your fabric or canvas. If you haven't used PCStitch before, definitely play around with it. Now that I've got Edgar to 16x24 pixels, I will click Next yet again.
Next screen is to adjust for brightness...no need for that here. Next.
Now the next screen is for floss colors. It is also not important for this tutorial, but it is a fascinating screen you should play around with when you get a chance: see what a picture will look like if you make with 14 colors or 200 colors. See what it will look like if you only use metallic floss or rayon floss, etc. But I digress: FINISH.
Now I've got my edgar pattern. I am going to go to View > Zoom to 300% and then View > Display Stiches As > Colored Blocks + Visible Symbols (or ctrl-F5). And I get this:
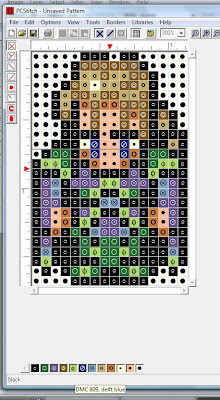
At the bottom of the screen is a row of colored blocks that correspond to the pattern. If you roll your pointer over the block, a pop up will tell you the DMC Floss number and the color name. In my image, the example is #809 - Delft Blue. Write down all the color numbers for your craft store shopping list, and if you own PCStitch, save the pattern for future reference. If you don't own PCStitch, just remember all the above steps (it will be a snap after a few times) so you can retrieve your pattern at your leisure later.
In the case of Edgar, we need 310, 319, 333, 433, 704, 796, 809, 3045, 3776, 3823, and 3825 (and if you filled in the background in the optional step, you should have a background color for that too). Most small sprites will only need 1 bundle (with leftovers to spare), maybe 2 for black and larger fields, for each color in the sprite, but the background usually uses up 3-5 bundles easy.
4. So now you've got your floss shopping list. Now if you don't already have some, add
14 ct plastic canvas (in Houston at least, in Hobby Lobby it comes in sealed packages with 2 sheets each for around $2.39 while Michaels sells them individually for around 79 cents a piece - both stores keep them near the larger plastic canvas usually in an the aisle next to the DMC floss),
embroidery scissors, and
needles (I prefer tapestry needles around size 20-24 as they don't prick my fingers). I usually hold off on the
frame and mat until after I finish the sprite since I don't plan ahead, but if you already figured out how large it is going to be, add those to your list too - Walmart usually has some bargain frames that come with mats for $3 on display in the aisles of their stores.
If you plan on doing a lot of these, you might also want to pick up a copy of a stitch encyclopedia or sampler. I use
this one. It isn't necessary for this tutorial as I will link you to diagrams of the stitches.
Now you are ready to begin stitching. I recommend finding a DVD set of a tv show you like and settling down for a marathon viewing because the stitching will take you FOREVER.
Stitching Your SpriteThis will be more free-form than the last section. I like to stitch the outline of my sprite first so I can lay the mat over it and make sure it will fit (I've learned from past mistakes), but if you prefer doing it from inside out, that's fine too. There's probably a "correct" way of doing these things, but I sure don't know it. I just know this works for me.
1. I usually just eyeball where I need to begin stitching on the canvas and can't really help you with knowing the best, prepared way to begin. If you are also an eyeballer, for your first sprite, I recommend just starting near the middle of the plastic canvas until you have gotten used to how they will translate.
You could, of course, figure out how big your sprite will be (remember, 1 inch = 7 pixels for mosaic stitch or 14 pixels for half cross stitch), how much space you will need for background and for a bias around your canvas all ahead of time so as not to waste canvas....but I can't say I do that. Then again, I have recently had some major issues with a few sprites, after hours of stitching, not fitting into the standard mat size because I did not plan ahead to make sure that they would...so fair warning.
2. I usually start with the outline, and I usually start with that in the top left corner and work my way counter-clockwise. I use all 6 strands of the floss, because I like the full look it gives.
Since Edgar is small, I will be using a mosaic stitch, which looks like a perfect little pixel. For larger sprites, I use a tent, or half cross stitch. Here are examples:
 This megaman sprite uses the mosaic stitch - only the sprite is done in mosaic...we will get to the background later.
 Wart is done with a tent stitch. Notice how each pixel is basically half a cross stitch
If you are new to needlework, here's an explanation of how to start a stitch. I use the waste knot most of the time:
E-How: Your First StitchTo sum it up: You basically just make a knot in your thread, push through on the
front side (the side everyone will look at when you are done) and work your stitches over the tail on the backside until it is secure enough to cut the knot off.
The mosaic looks like a cross-stitch, but it isn't. Here are two explanations the mosaic stitch:
Stitchopedia's explanation of the Mosaic StitchThreadneedle's explanation of the mosaic stitchHere is an example of a tent stitch, which is basically a cross stitch with only one side of the X, if that makes sense:
Stitchopedia's explanation of the Tent StitchThreadneedle's explanation of the tent stitchWhen you start to get to the end of your floss, push your needle through 3 or 4 stitches on the
back side to anchor it and then cut the excess thread off.
So now you should be able to stitch the sprite. I personally just follow the pattern on PCStitch on the computer screen most of the time, and occasionally print out simple, easy to follow sprites through Photoshop if I plan to work on it outside of the house (you must buy PCStitch to print out patterns...I'll get around to it eventually). Some people like to graph the patterns themselves or you could even use a bead sprite you've already made for a pattern.
I usually just do outline + black first and then do the colors in whichever order strikes my fancy.
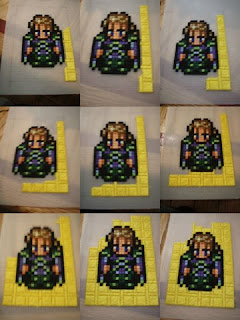
Here's what I've got done tonight:

Stitching the sprite alone takes me about 4 hours to do.
Preparing for the Background1. Now it's time to start getting ready for the background. I keep a couple of mats on hand to do this, but if you don't have a mat yet, it's not necessary.
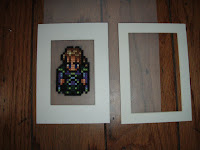
The openings for the smaller mat measures 3 inches wide by 4.5 inches tall. The larger mat opening measures 3.5 inches wide by 5.5 inches tall. I'm going to center my sprite inside the mat (if you don't have a mat, just use a ruler to figure out how big the window should be) and count the holes on each side. Then I'm going to remove the mat and trace a rectangle with a pen, adding 2-3 holes on each side for a bias.
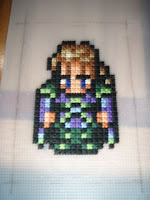
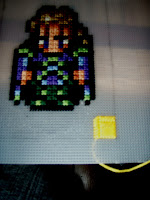
For Edgar, that means I am going to count 10 holes up and draw a line across that row. Then I'm going to do the same thing on the bottom. On the sides I'm going to count 7 holes out on each side and draw a line on that column. Here's a picture with the rectangle:
2. Now it's time to choose the background color, if you haven't already. I have a whole stock of DMC floss, so I usually just put them up against the sprite and figure out which one I like best. When I first started stitching, I would just bring the finished sprite in with me to Michael's or Hobby Lobby and hold the floss bundles up against it until I decided which color I wanted.
Remember, you're going to want several bundles of this color because doing backgrounds definitely eats up floss like none other.
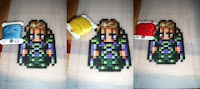
I go compare a lot more colors than this, but that's just to demonstrate. I like the yellow (#973) the best, so I'm going with that.
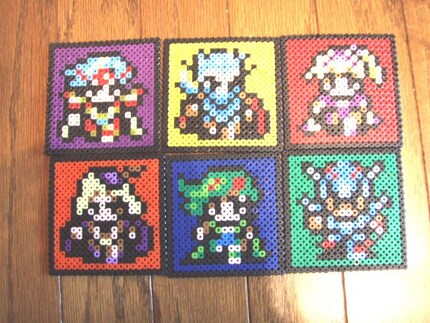
Stitching the Background1. For Final Fantasy characters, it's become a tradition for me to use a variation of the Scottish Stitch:
Stitchopedia's Explanation of the Scottish StitchBut there's tons of stitches you can choose from, you can consult
Stitchopedia or, if you have one, a hardcopy Stitch encyclopedia. I try to stick to
diagonal stitches because I find that they cover the canvas better.
2. I almost never follow stitch diagrams exactly for my background stitches. I like to mix it up by making the stitches wider, longer, etc. For this sprite, I'm going to make the inside cushion of the Scottish stitch a 7x7 square. I'm also going to make the border around the cushions 3 holes long because this will allow me to create an interlocking, Celtic-like pattern.
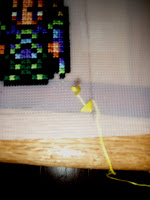
I've adjusted the contrast so you can see it better...this is the beginning of my scottish stitch, complete with the waste knot. I always start in the bottom right corner of the background.
This is the first square finished, as well as the start of the border. Now I am going to kick back and watch 24 while I finish up this background, which will also take me about 3 or 4 hours to finish.
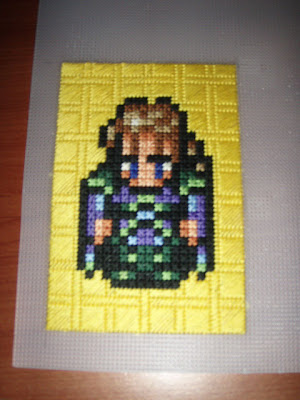
So a good chunk of season 1 of 24 later, and I'm done. As with everything, I don't go in any exact order when it comes to filling in the background. Now I just have to cut out Edgar, leaving a bias around the needlepoint....

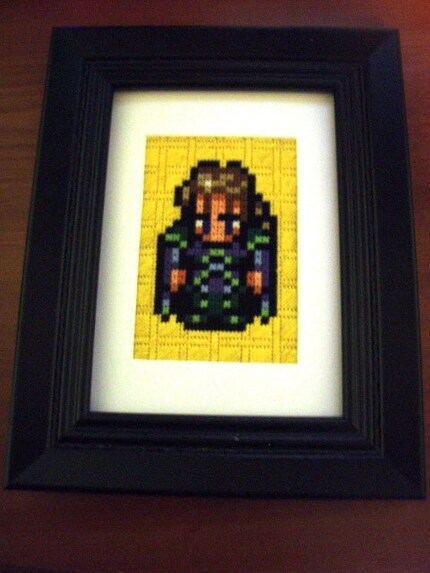
and then I get to frame him:
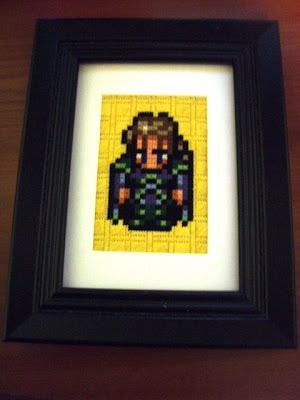
And that's that.
If you liked this tutorial, please
let Digg know that you dugg it